Dashboard filters
Dashboard filters (also known as workspace filters) can filter data across the entire dashboard. Oftentimes, these filters are built into a dashboard to let you pick the data you want to see.
|
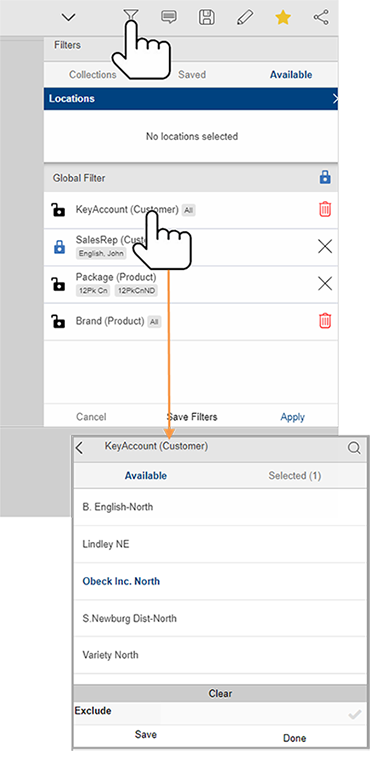
You can access this type of filter in the dashboard's Filters panel, which also shows any applicable global filters To edit a dashboard filter (e.g., select a different member) After opening the Filters panel, tap on any filter to edit it; then, choose one or more members to filter on them. Tap on Done and then Apply. To show data for all members (i.e., ignore the filter), leave it set to "All" in the filter panel. Tip: To filter out data for the selected member(s) rather than including data for those members, you can turn on the Exclude option at the bottom of the filter menu.
To add a dashboard filter In the Filters panel, go to the Collections area; then, apply or create a collection. |
 |
 that are turned on.
|
To clear or remove a filter In the Filters panel, tap the X to clear a dimension or key filter (i.e., show data for all members). Tap the trash icon to completely remove a filter. Key and dimension filters must be cleared before you can remove them. Tip: You cannot remove a filter if it has a corresponding filter widget in the original dashboard. |
|
Saved filters
|
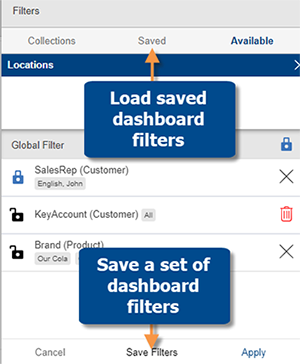
You can save and reuse sets of dashboard filters. When you load saved filters, only applicable filters will be used (i.e. dimension is used as a group by in the dashboard). |
|
Location filters
In addition to the filters shown here, dashboards may be filtered by one or more geographic locations using the Location panel.